When developing or refining a chatbot, testing is crucial to ensure it delivers the desired user experience. However, lingering conversation history can interfere with your tests, especially after updates to the bot’s prompts or AI model.
To get accurate results, you need a simple way to clear your chatbot’s memory and start fresh. Here’s how to do it with Chatbot Builder AI.
Why Clearing Your Chatbot’s Memory Matters
Old data from previous conversations can:
- Skew results during testing.
- Prevent updates to prompts or AI models from being reflected in responses.
- Lead to inaccurate assessments of your bot’s performance.
Clearing memory ensures you’re testing on a clean slate, allowing for precise evaluations and smoother iterations.
Step-by-Step Guide to Clearing Your Chatbot's Memory
1. Create a "Clear Memory" Flow
- Add a New Flow:some text
- Open Chatbot Builder AI’s visual flow builder.
- Name the flow "Clear Memory" for easy identification.
- Use a Descriptive Naming Convention:some text
- Clearly labeled flows make your chatbot’s backend easier to manage.
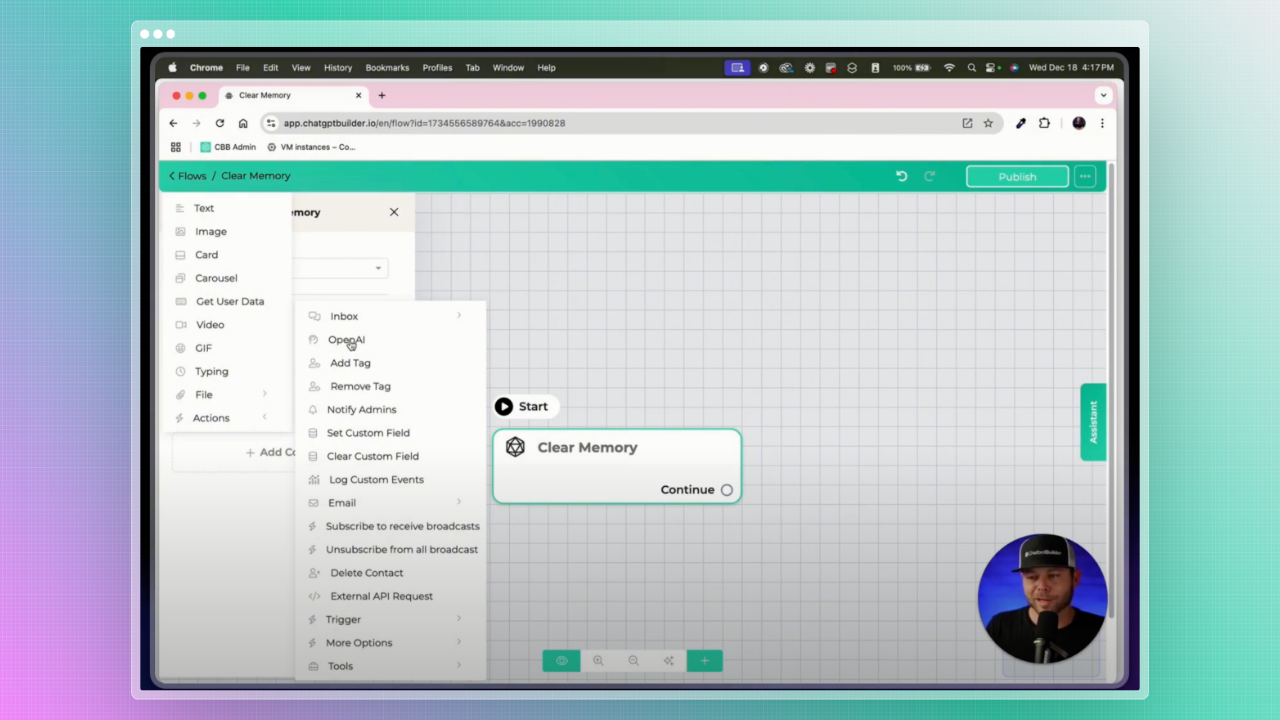
2. Integrate the "Delete Message History" Action
- Add a Content Action Block:some text
- Insert a new block into your "Clear Memory" flow.
- Select the AI Provider:some text
- Choose your integrated provider (e.g., OpenAI, Gemini).
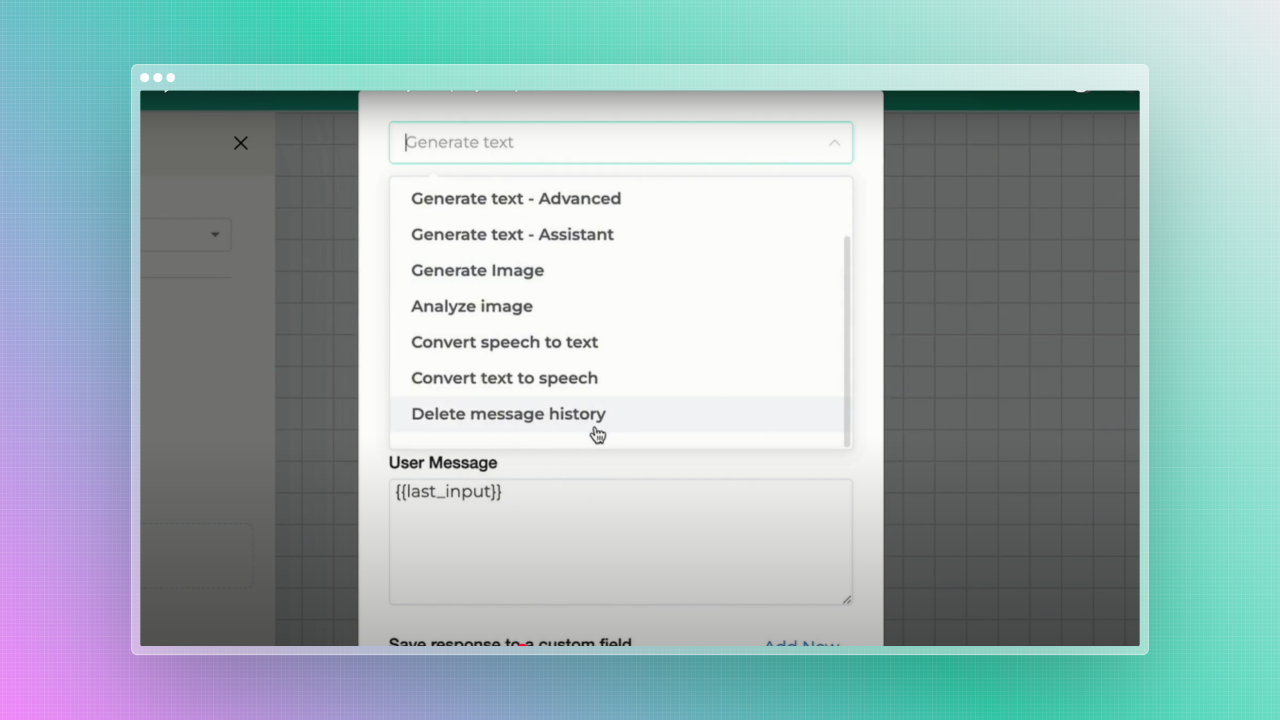
- Enable the "Delete Message History" Action:some text
- This action ensures all previous interactions are erased, providing a clean slate for your chatbot.
💡 Pro Tip: Regularly test your memory-clearing flow to confirm it’s working as expected.
3. Set Up a Keyword Trigger
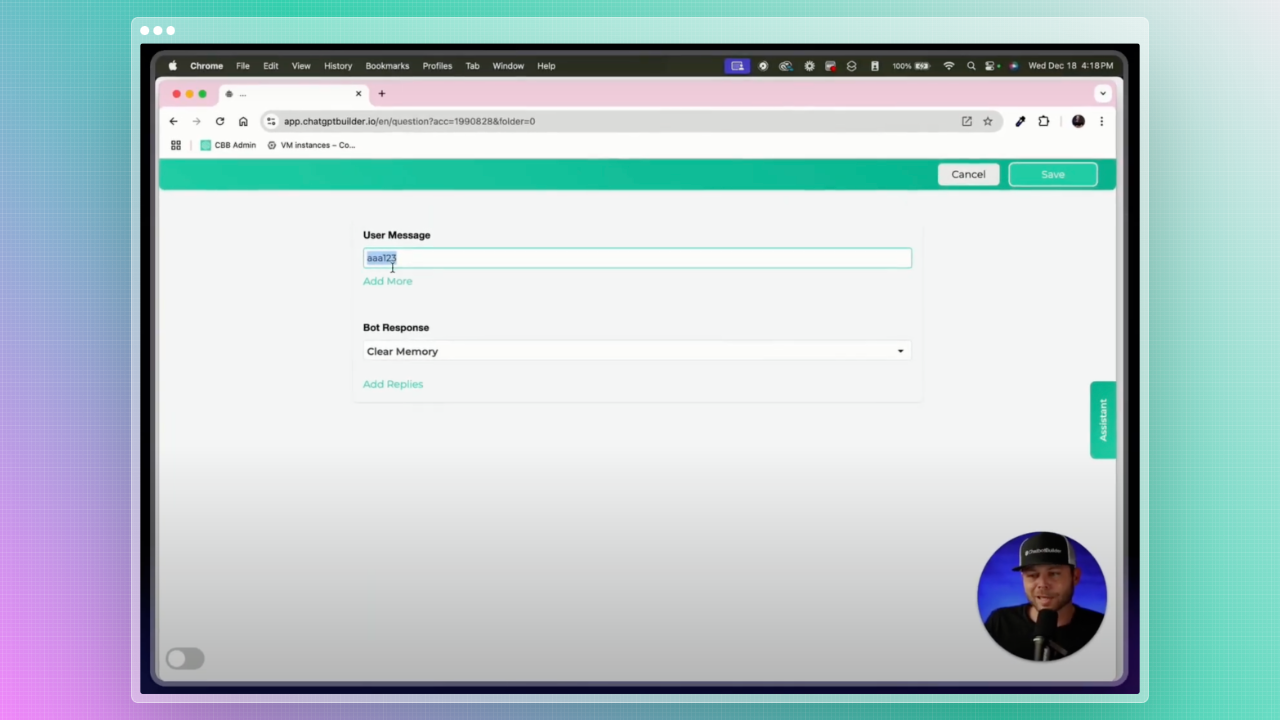
- Define a Unique Keyword:some text
- Choose an easily identifiable phrase, such as "AAA123", to activate the memory-clearing flow.
- Link the Trigger to the Flow:some text
- Ensure the keyword triggers the "Clear Memory" flow seamlessly.
💡 Pro Tip: Avoid using common phrases as triggers to prevent accidental memory wipes during user interactions.
4. Test Your Implementation

- Publish Your Changes:some text
- Save and publish the "Clear Memory" flow.
- Simulate a Conversation:some text
- Engage with your chatbot as a user.
- Trigger the Flow:some text
- Send the designated keyword (e.g., "AAA123") to activate the memory wipe.
- Observe the Results:some text
- Confirm that the chatbot’s responses reflect a fresh start, unaffected by previous interactions.

Why This Step Is Essential for Accurate Testing
Testing on a clean slate ensures that:
- Updates to prompts or AI logic are accurately reflected.
- You can evaluate your chatbot’s behavior as if interacting with a first-time user.
- Potential issues caused by residual data are eliminated.
💡 Real-World Example: Imagine you’ve updated your chatbot to handle customer queries more efficiently.
Without clearing its memory, lingering data from old tests could cause it to revert to outdated behaviors, skewing your evaluation.
Key Takeaways
- Memory Wipe Matters: Clearing conversation history ensures accurate testing and optimal chatbot performance.
- Simple Setup: With Chatbot Builder AI’s intuitive tools, creating a memory-clearing flow is quick and easy.
- Ongoing Testing: Regularly test your chatbot on a clean slate to ensure updates are fully implemented.
Ready to perfect your chatbot? Start refining your testing process today with Chatbot Builder AI.

.png)
.png)